React Native Live Stream Video
By Maaz | February 24, 2022 | React Native |

Streaming is something that we see every day at all times in applications such as Instagram, Tik Tok, Twitter, Twitch and Youtube. Having a streaming functionality in an application sounds a bit difficult. However, luckily for us, with React Native live stream video and a third-party libraries, things are much easier. So let’s take a look at how to add a live stream video functionality to an app.
Requirements for React Native live stream video
In this project, we will use the react-native-nodemediaclient library.
So, after running “npx react-native init ProjectName” and creating our project, we will go to our project’s root folder and install the library running one of the following commands in our console:
- npm install react-native-nodemediaclient
**OR **
- yarn add react-native-nodemediaclient
If we are using a Mac environment we’ll go to the iOS folder and install the pod dependencies by just running the following commands:
- cd ios
- pod install One last thing we must do is grant camera permissions for our project.
For Android, just add the following lines to ProjectName/android/app/src/main/AndroidManifest.xml :
Link: script For iOS, add the following lines to ProjectName/ios/QLive/Info.plist:
Let’s jump into the code
In our application, we will have 3 screens:
- Main screen
- Streaming screen
- Play Stream screen
Note: This implementation was written using functional components and hooks.
MAIN SCREEN
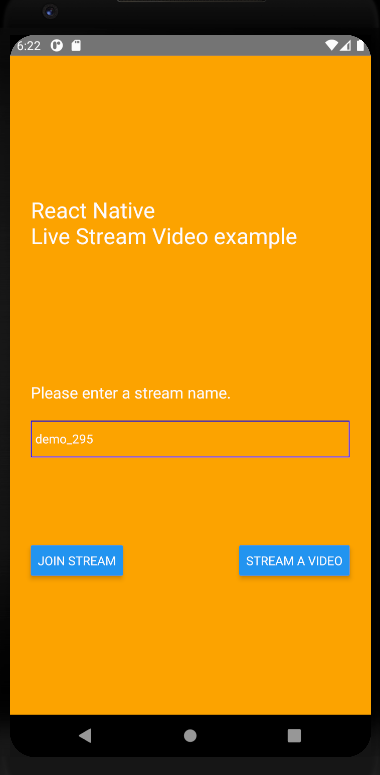
This is the screen we will see when our application starts. The function “requestCameraPermission”, as the name indicates, will ask our device to grant Camera and Record Audio permissions.
The useState hooks are used to store the Stream player and Live Session server URLs.
The useEffect hook uses the request permissions function on Android devices (using the Platform API) when our component mounts for the first time.
Then, there’s the screen container where we have an input to write the streaming name that we will place at the end of the URLs.
At the bottom of the screen, we have two buttons to go to the other two screens.
Finally, we have a navigation component to navigate inside our application.
Link: script
STREAMING SCREEN
This screen is where we will use our mobile’s front or back camera to start streaming.
Keep in mind that the first time we get to this screen or the Play Stream one, we will be asked to grant Camera and Audio permissions.
We use a useState hook to set a reference to the NodeCameraView component and the useEffect hook to stop the streaming content once we get on the screen.
Inside the NodeCameraView component, we have props that we can use to adjust the audio definition, video resolution, the available cameras, and much more.
One important prop of this component is outputUrl, which is where we set the URL and ports where our streaming will be played so others can join it.
At the end of the component we have three buttons with the following functions:
- Switch between the front and back camera.
- Start the stream transmission or stop it.
- Return to the Main screen.
Link: script
PLAY REACT NATIVE LIVE STREAM SCREEN
On this last screen, we can use the useState and useEffect hooks to get and set the component reference, but in this case, we’ll use NodePlayerView.
As the name states, this component is used to see streaming content. On its inputUrl prop, we will set the URL from the streaming that we want to watch.
Our example sets the URL from the input on the Main screen where we can write the name of the Stream we would like to join.
Other props that NodePlayerView has are the autoplay option, buffer time and max buffer time; these last two can be used to adjust the transmission if the video is getting some delay.
The onStatus prop is used in this example to display the streaming state on the console, so we will be able to see when the transmission is finished or when we disconnect from it.
Keep in mind that if we set a wrong URL or the transmission is finished, we will see a black screen.
At the end of the component, we have a back button to return to the Main screen.
Link: script
Application preview

Final thoughts on React Native Live Stream Video
One of the best things about React Native is that there are always third-party libraries that make things easier for us. As we have seen in this example, integrating streaming features into our applications was quite simple thanks to the Node Media Client library. Are you ready to try it out?
RELATED POSTS

Python
Python for CI/CD
Avoiding integration hell is a must-do but seemingly simple task when your organization starts growing…

Resources
Meet Figma and its incredible San Francisco headquarters
We are not shy when it comes to our love for San Francisco and definitely

React Native
React Native Live Stream Video
Streaming is something that we see every day at all times in applications such as
